


 7. Apply your adhesive vinyl/stickers/ribbons/bows/whatever!
 |
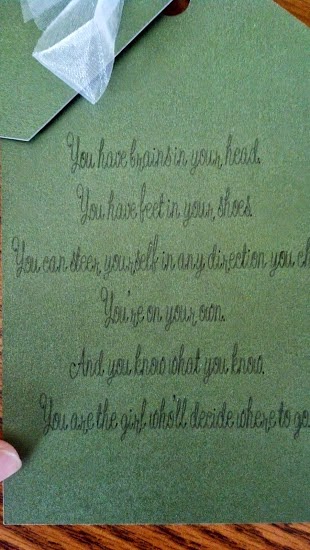
| The cover was made with vinyl for the lettering and flourish. I then used printable vinyl and the new print then cut feature for the owls! |
 |


 |
| I added monthly photos to the end of the book so mom can add her own photos through out the year! |
 So the box card fad has been around for awhile now and for some reason I just haven't given a shot. I got a great template for the box card from the Facebook group Cricut Lovers Guide to Design Space. I added my own panels to the template and then decided to make my first box card a Halloween theme. Halloween is one of my favorite holidays, only slightly behind Thanksgiving and Christmas. I used the cute little Halloween bears from Teddy Bear Parade and and some Halloween phrases I found by searching Halloween in Design Space. That feature has to be one of the most underrated perks of Design Space. I find cuts that I had no idea I had! I embossed my card using the swiss dots folder and added all my decorations. For my first attempt I am happy with how it turned out! I have a few more ideas for these cards and can't wait to start on them!

 This was super fun and easy to make with my explore. I started out with some basic shapes, a circle and a flower. I then added my text using the writing feature. This has to be my favorite feature of the Explore! Simply enter in your text then click attach! I then found an arrow shape to attach to a clothespin. After cutting all my pieces I realized the card stock I picked out was kind of flimsy. I had just used up a Cricut mat and it was sitting on my floor next to my trash bin. I thought that would make a perfect backing to my sign! So I decided to bust out my deep cut blade and give it a shot. It took a few adjustments but after using a multicut of 7 and the pressure on the highest setting, I was able to pop out the circle shape from the mat. I added a few metallic embellishments and I was good to go!
 So I have seen multiple people using their Explore to cut JPGs and other photo types. I was referred to stencilgram.com, a website that will turn any photo into a stencil AND let you save it as a SVG! Brilliant! I had to try it out so I picked a random photo and uploaded it onto the website. Easy as pie. It allows you to adjust the "stencil" so you can get it just as you would like it. Then after saving it as an SVG I uploaded it into Design Space. I simply cut it out of vinyl and after some weeding adhered it to a canvas. Fun little tip, I I put a border around mine so it made the weeding WAY easy. All those white areas along the edge peeled off when I pulled off the border. The only weeding I had to do was in the middle. For my next one I plan on painting the canvas to do a more layered effect. I just love this machine. It seems like the possibilities are endless with it!
 Happy Sunday! Today I made a cute little easel card for my friends retirement party. I made mine a little different than the typical easel card but I think it still came out fun. Easel cards are probably one of the easiest cards to make. You simply make a regular card then make a "face plate" for the front. I designed my card to be slightly under 6x6. I then made my face plate the same size but cut it in half so my image stood out on it's own. If you prefer the entire front to be sticking up then just make it the same. You can also do this by using shapes welded onto your square/rectangle.
 For this one I wanted to do a chair with a cat. My friend loves her cat and after working for over 30+ years she deserves to take a moment and relax with her cat Max. The image comes from the country life cart. The writing on the front is from Creative Memories Tiny Treasure and the inside font is Teresa Collins Soiree. Once again my explore made the writing come out beautifully. I embossed the front of my card (not the face plate) using swiss dots. I then scored the front of my card in the center. I attached my face plate with the writing on it to the bottom half of the card and then my image. Inside I cut a simple scalloped oval and wrote my greeting. That piece is what holds the easel up. I embellished it a bit and really enjoy how it came out. The file for this card is located below! Happy Crafting!
 Yesterday I celebrated 5 years of marriage with my hubby! A special guy deserves a special card so I pulled up design space and got to work! This project reminded me why I love the Cricut Explore. The write feature not only let me create my own greeting inside but also let me add fun flourish to the front. It was awesome to make and such a breeze. The file for the template is located below! Thanks for taking a look!
 Between school and work I just haven't had the time to work on any projects like I would really want to. Thankfully today I was able to sit down and finish up some pages for my friends baby book and work on my anniversary card. I'll only be posting pictures of the baby book pages until I actually give my card to my hubby.


 I haven't had a whole lot of time to work on craft stuff between school and work but I did make my little sister a fun graduation present. She graduated from Ohio University a few weeks ago so I made her a vinyl Ohio University canvas and a Bob Cat Card to go with it. I got to take advantage of my Explore writing ability and put a fun Dr. Seuss quote inside. Hope you all enjoy!
 It's another Saturday so that means it's time for another page to be completed for Mikayla's baby book. She recently found out she is having a little girl and I am so excited for her. We are all anxiously awaiting the arrival of this little bundle of joy! For the gender reveal, she had cupcakes made. This of course needed a page in the book so off to work I went. I designed everything in Design Space. The owl is from Miss Kate's Cuttables, the shoes from Kate's ABC's and the frame from Small Talk Frames and Tags. Mom requested that I use purple now that we know the gender and I had zero problem with that since purple is my favorite color! I am really enjoying putting this book together for her!
 I have been working on a baby book for my close friend Mikayla for awhile now. She recently announced she was expecting on Facebook and I wanted to make sure that was in the album. I am just so happy with how fun it came out. I printed off her announcement and then cut out all the comments and pasted them down around the photo. The background was made using my Cricut Explore and the Edge to Edge cartridge. Once I get this bad boy all finished up I will be sure to post the whole book!
 Happy Sunday! Today I am sharing with you a fun little Easter card I made. I was browsing Pinterest (no surprise there) for some inspiration and came across multiple variations of a cute little bunny butt hanging out of a hole. I decided to try and put my spin on that type of card and this is what I came up with.
 My bunny was made simply out of circles and ovals manipulated into a fun bunny shape. His little tail is made from a star and the base is a simple square. Using Cricut Design Space made designing this card a breeze. I did an image search for Easter and found a "Happy Easter" that I thought fit well